HDRI: High Dynamic Range Imaging
This tutorial will show you how to use HDRI images to make realistic environments and lighting.
HDRI images are called High Dynamic Range Images because they have a high-range that can simulate different amounts of light. Normal images can have lighting from 0 (black) to 255 (white). HDRI images can have a much higher range since it stores values differently. The main format of HDRI images are Radiance *.hdr files. Now, 3ds max 6 can use HDRI images without third-party plug-ins.
What you need for this tutorial:
- HDR Shop: Download Version 1 for free at http://www.ict.usc.edu/graphics/HDRShop/
- Eucalyptus Grove HDR image
- 3ds max 6+ or earlier release with HDRI import plug-in
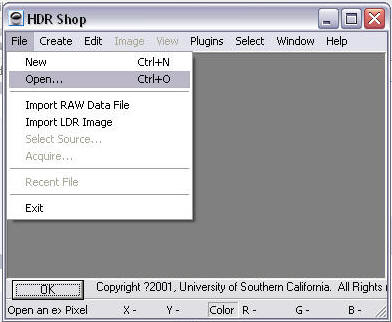
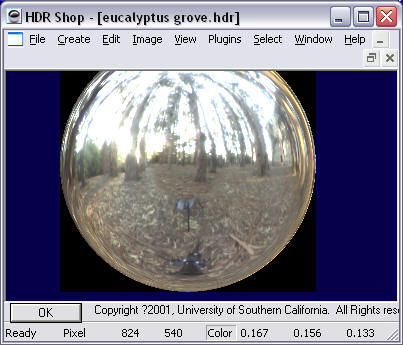
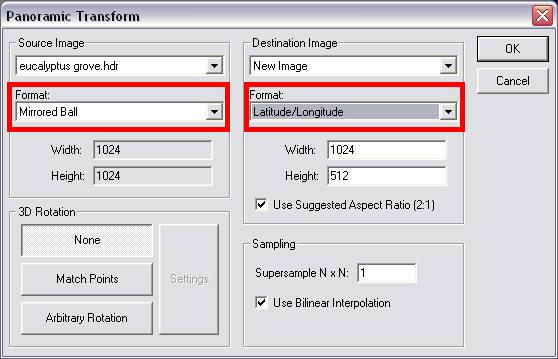
First of all, we'll need to modify the HDR image we downloaded a little. If you'll notice, it's in kind of a ball shape because it was taken with a light probe. We want it in a rectangle shape. So... open up HDR Shop and go to open and open up the .hdr file you downloaded (you might have to unzip it):
Unzoom and it will look something like this:
We want it to be a rectangular map. So... go to Image > Panorama > Panoramic Transformations. The program can convert it into a rectangle.
You'll end up with something like this:
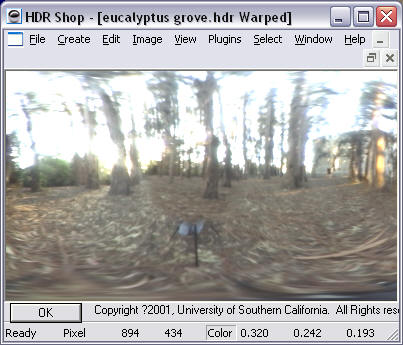
Save it. I just saved it with the same name in my 3dsmax\maps\Reflections folder.
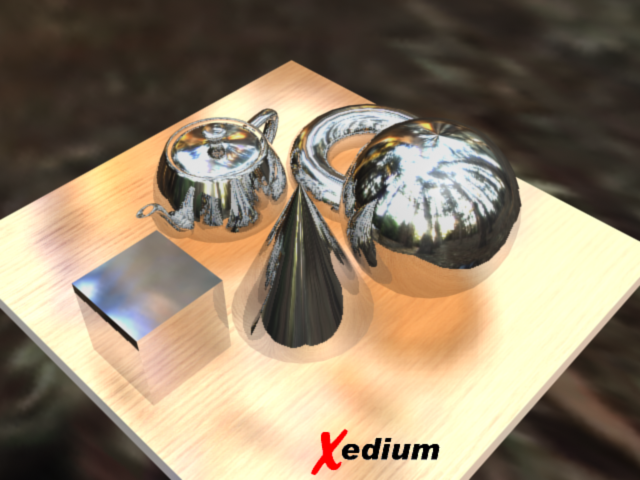
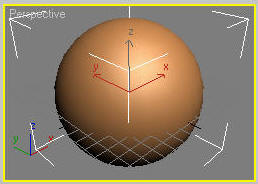
Now, open Max. To get started, we'll make a simple sphere to test with:
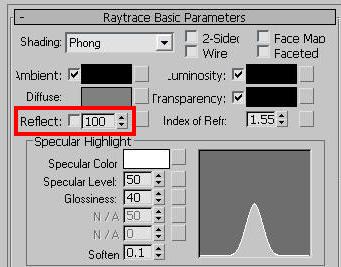
Open up your Material Editor (M). We'll make it real shiny so it can reflect the environment. Make a new Raytrace material and set the Reflection to 100.
Now for the environment. Go to Rendering→Environment and proceed to put the HDRI file in the Environment slot. It'll pop up with a line graph and some lines and stuff. That's for adjusting the maximum brightness areas and black areas, but the defaults will work here.
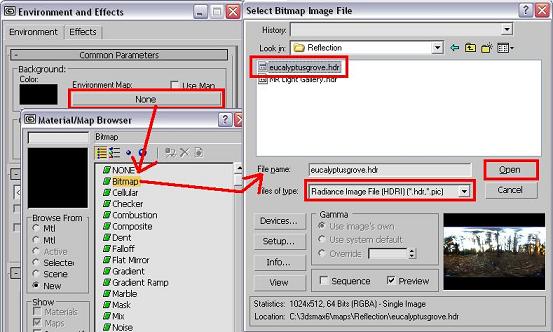
But there's a problem. If you render a few viewpoints, the environment won't look right. It'll follow the camera. Instead of being an all-around environment it's just like a background image, and you don't see your sphere. The problem is with its mapping coordinates, which define how this image should be mapped in the world.
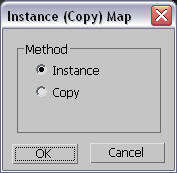
Open up the Material Editor but keep the Environment dialog open. Now drag the map in the Environment map slot into an empty box in the Material Editor. Make sure you choose Instance and not Copy, so that they'll stay linked.
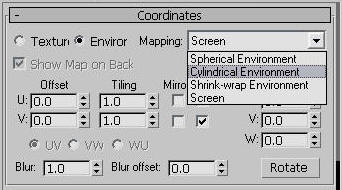
Now, with change the Mapping Coordinates from Screen (wherever you're facing) to Cylindrical Environment (A cylinder around you). You could also try Spherical to see how it changes.
Now, when you render it will produce some nice results. The end result is that your sphere looks like it's floating in the forest, since the HDRI map perfectly duplicates the original environment lighting.