
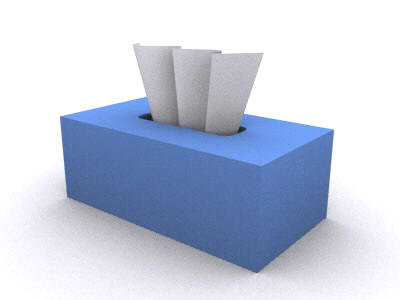
Making a tissue box in 3ds Max
In this tutorial, you will learn how to model a tissue box (like the one above), using various techniques involving splines. I chose a tissue box because it is simple, but still has some interesting geometric features. If you are using an older 3ds Max release than R6, you can use the Solidify plugin.
Tissue box
To start out, create a box in the perspective viewport. Call it "tissuebox". Make it about the size of a tissue box. That's really up to you. For sake of simplicity, go into Move mode (W), and right-click the Move button. That'll bring up the transform type-in dialog. Make the numbers zero. That'll put it smack in the origin.
For many of you, your first impulse would be to use Boolean to cut the hole on top and hollow it out. However, the Boolean feature often creates bad geometry and makes further modification difficult. The new nPower Boolean can be a little better, but it's still not necessary to use 3D booleans. Instead, we will use ShapeMerge.
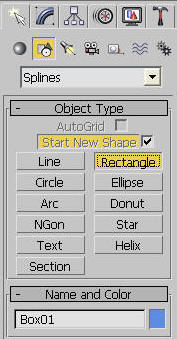
Create a rectangle spline the size of the hole you want to make. Adjust the corner radius until you get a nice rounded corner.
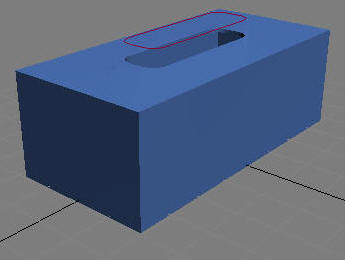
Again, make its position 0,0,0. Now, move it on its Z axis only (or whatever is straight up), until it's above the box.
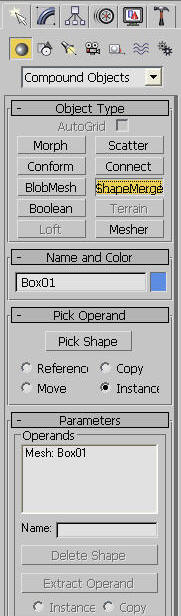
Now, we'll be using the ShapeMerge function's cookie cutter ability. It does what it sounds like; it cuts shapes out of objects. Select the box, and then click on ShapeMerge.
Click on Pick Shape, and pick the rounded rectangle your drew. A little lower in the dialog, make sure you select Cookie Cutter, and not Merge.
We're closer, and without Boolean's face errors and whatnot. Now, to give all those 2D faces some thickness. This is where Shell comes in (or the older Solidify plugin, if you're using 3ds Max 5 or earlier). Apply Shell.
The Shell modifier gives surfaces a thickness. If you make any holes in the surface, it automatically treats those as shell openings. Now it's all nice and solid. You can delete or hide the spline if you prefer to.
Tissue
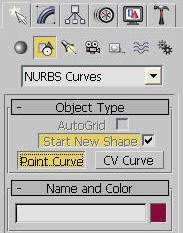
We will continue and make the tissue. Create a NURBS Point Curve, and draw a wavy line in the top viewport.
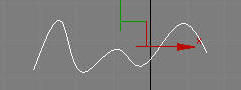
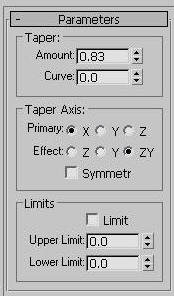
That will be the shape of our tissue. Name it "tissue". Now, apply and Extrude modifier to the spline. Make it about a tall as a real tissue. Apply a taper modifier, and taper the bottom down.
Now, move the tissue so the big end is sticking out of the box. Resize and distort it as necessary until it looks nice.
 blog comments powered by Disqus